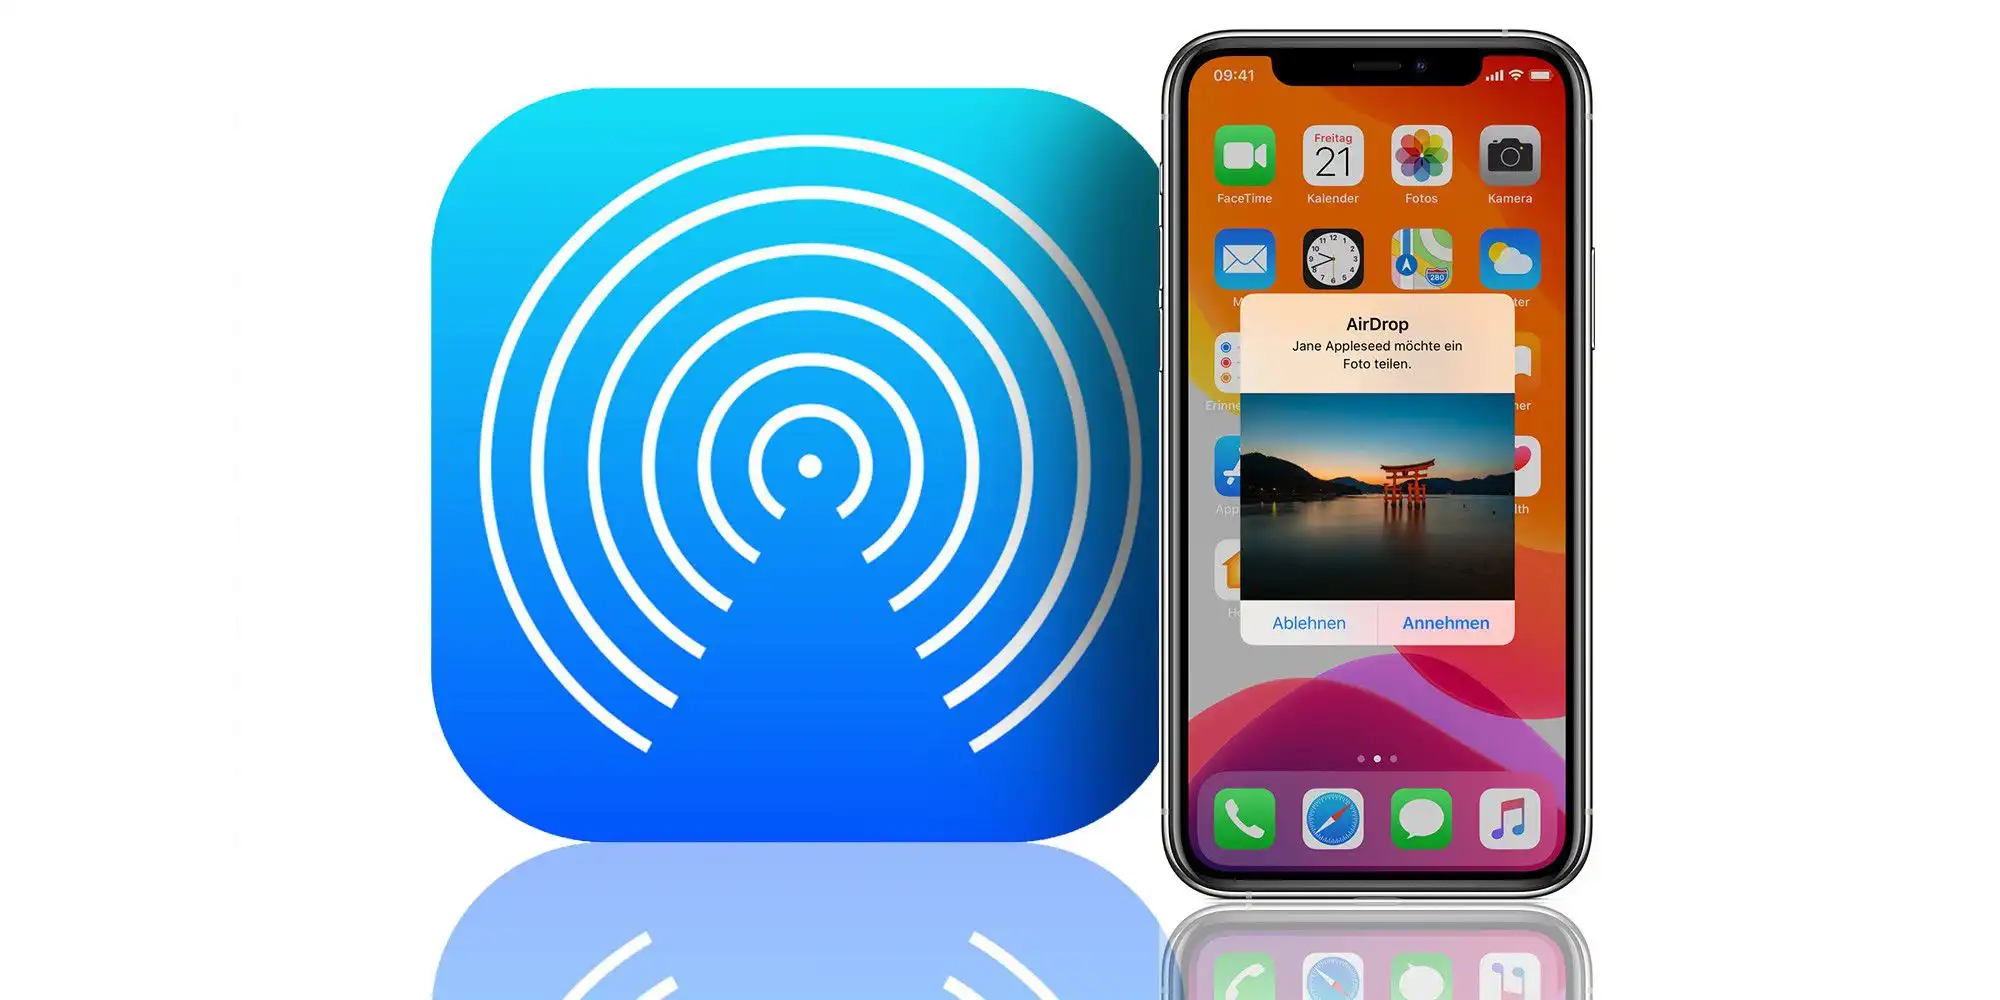
Apple offers highly valued functionality for its users such as airdropwhich allows us to share with amazing ease, files wirelessly between our devices with a couple of clicks. But how to have AirDrop in Windows?
This question has been asked by many users who do not have a Mac. They have always looked for alternatives in Windows for this functionality, and it seems that they have finally been heard, now those users who have Apple devices such as iPhone or iPad, but not Mac , you will be able to do something similar on your Windows computer thanks to Nearby Sharing which is integrated into the current Windows 11.
Let’s see how to do it!
AirDrop on Windows, requirements
To use this file sharing feature with Windows 11, the devices that are going to be used for file transfer must support Bluetooth 4.0 or later with Bluetooth LE support.
As long as both devices have Bluetooth 4.0, you can also Share files between Windows 10 and Windows 11.
If you don’t have this type of Bluettoth on your computer, it’s not all lost yet, because the Microsoft team is working on Windows 11 complications that allow us to use Wifi instead of Bluettoth, or even a standard wired network through from UDP.
Now we have Nearby Sharing that allows the transfer of files between devicesYes, individually, we can transfer a complete folder. Although as always we can pass a file compresor (ZIP) and share it, and then unzip it when we have transferred it. This is how we would have AirDrop in Windows, let’s see how to configure our equipment.
Enable sharing
In order to use Nearby Sharing on your Windows 11 computer, you must first make sure it is enabled. For it, press Windows + i to open the Settings applicationor you can also right-click on the menu Start and select «Setting«.
In Settings, we select the option «System» and then click on » Nearby Sharing «nearby sharing.
In the configuration of the Nearby Sharing functionality itself, we have three options, “off”, if we want to turn off the functionality and not have access to it, then we have the option “Only my devices” if we don’t want to share files with anyone outside of our own teams or “All who are near.”
If you choose the option of “Only my devices«, you can only transfer files between devices signed in to the same Microsoft account, so that the Windows computer can recognize them as your devices, and with the option “everyone close” means that any computer with nearby Windows you will be able to share files with that computer.
In addition, in Settings they will remind us if we do not have Bluetooth enabled with a small notification message that will remind us to activate it. If that’s the case for you, simply follow the notification that is displayed and follow the prompts to enable Bluetooth on your device.
Where to save the files
After that, we should configure on our computer, the place where we want the files to be saved received through this function.
To do this, we will go back to Setting and the option of «Sharing Nearby» (Nearby Sharing) and click on «Change«, to choose the folder where we want those received files to be saved.
We can also modify the name with which we want to appear when we use this function, for this we will go to System > About… and we will change the name if it is what we want.
Remember that if at any time you want to deactivate the function, you simply have to go back to Settings > System > Nearby sharing and select the “Off” optionthat’s it.
How to share files
Actually, the hardest thing was to set up the equipment and enable the functionality, we’ve already done that, now sharing files is very easy.
To do this, first we will locate the file we want to share in the File Explorer or on our desk.
Once we have found the file we want to share, we place the cursor over it, and click on the right button on the file, and select the Share icon, which is shown with a square and an arrow that comes out of the square pointing to the right.
A special file sharing window will open, and you will see a “Share Nearby” section. Your Windows PC will do a search for any Windows PC (10 or 11) that could be near you, and that also has nearby sharing enabled and that matches the restrictions set in Settings, remember, all devices or just yours.
Once the search is done, one or several names of the different computers that have been found in the search will be displayed, and we select the one with which we want to share the files, that’s it.
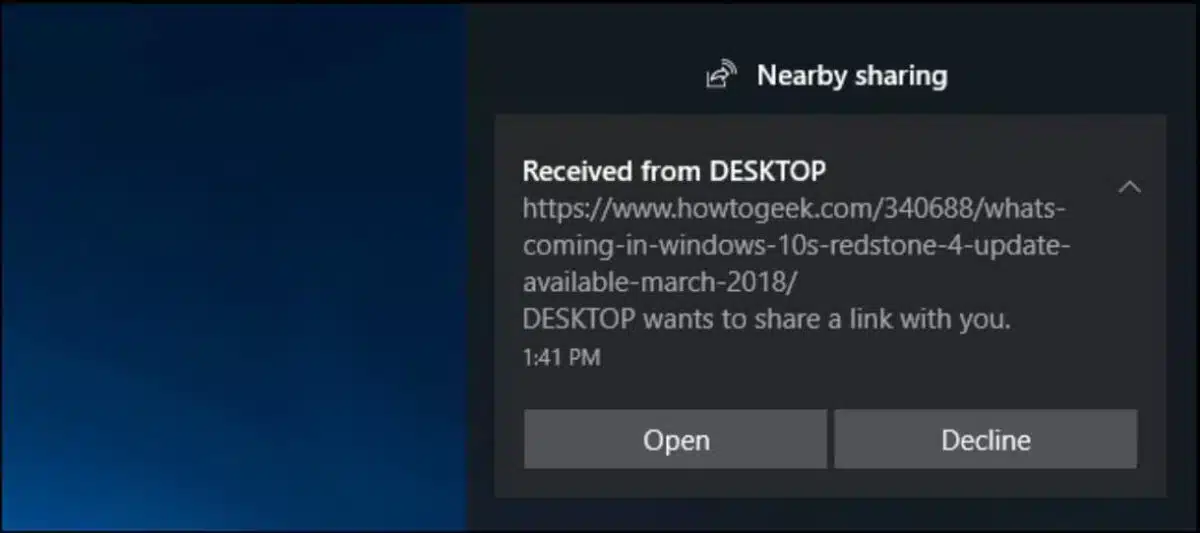
In a pop-up window in the lower right corner of our computer screen, we will see a notice that you are sharing files with the selected computer and we are waiting for the receiving device to accept that file transfer.
Receive files AirDrop style
On the receiving PC, a pop-up window will also be displayed, and in it we must click on the “Save” option.
Our Windows computer will transfer the file wirelessly to the other computerand when the transfer is finished, we will see a confirmation message that the transfer was successful.
You can open the received file instantly by clicking on «Open«, selecting “Open folder” to see your exact location, if we have not previously configured it, or if we want we can close the notification.
Anyway, remind you that your Windows computer by default will save the files received with this functionality in the Downloads folder, but as we have seen before, we can modify it quickly Settings> System> Share nearby, and we would choose the place Exactly where we want the received files to be saved.
And it would be Now you can share files from any Windows computer in a much easier way, as long as you have the option to enable this function.
It is true that it is a bit more complicated than AirDrop, which does it almost like magic (the company’s own slogan), but this is the only way we have to transfer files natively in Windows.