When we modify the quality of an image we are reducing image data, data that is barely perfectible for most people. In addition, redundant visual information that does not contribute anything to the image is always eliminated.
Reduce the size
Another method that we have at our disposal in Photoshop and that we can also find in many other applications is the option to change the size of the image, that is, the resolution. By modifying the resolution of the image, the space it occupies on the disk is reduced, however, the quality of the image is also lost, in addition to limiting the possibility of enlarging it to the original resolution and being able to see the details it shows us.
When you reduce the size of the image, information must be removed from the image in the process, so, just as if we reduce the quality, we are losing information, information that, for most people, is imperceptible.
change format
The format JPG It is the most used when working with images to maintain a decent quality with a reduced size. However, it is not the best option if we want to preserve quality, despite being able to represent up to 16.8 million colors, which is why professional photographers opt for the RAW format, lossless format.
The format PNG It is commonly used in the field of graphic design, since it allows you to add transparent backgrounds. However, the compression level of this format is practically non-existent, being other formats, like TIF, that we must avoid at all times.
In addition to the JPG and PNG format, we can also find files in TIF. This format offers better image quality, however, the compression is practically zero, so the size of these files is very large and it is not a good option if what we want is to save space on our computer.
Another format that is also used to store images. Although it was not designed for this, it is mainly used to display short animations. Although the compression level is higher than the JPG format, it does not support the same number of colors, so it is only ideal for images with very little color variation.
How to Compress Images in Photoshop
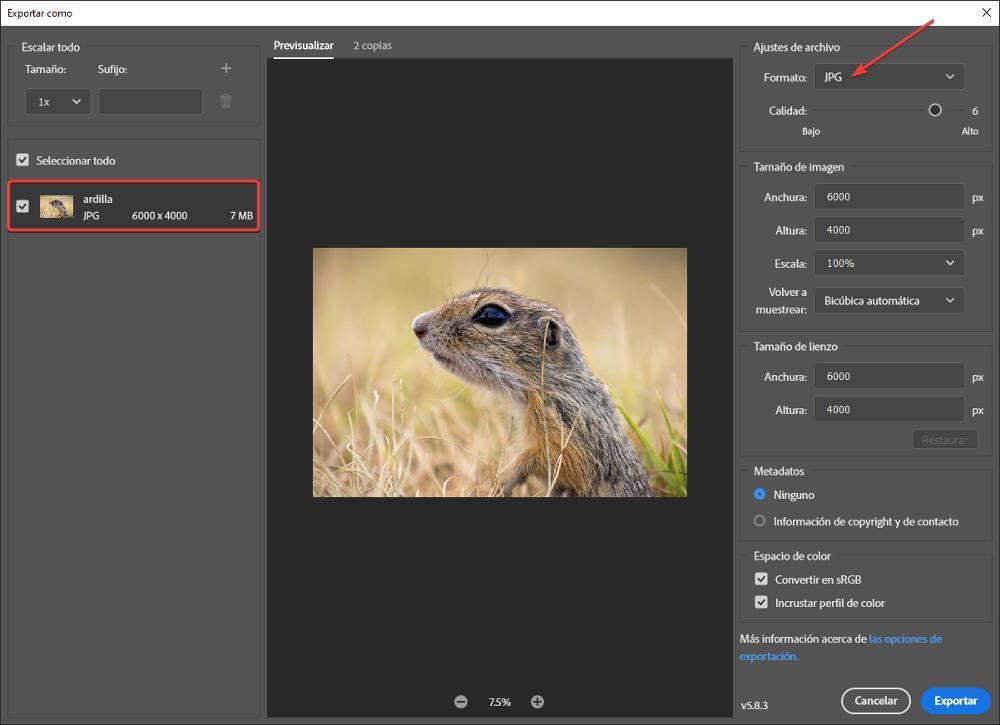
Once we are clear about the different methods that we can use to modify the size of an image, next, we will show you how we can carry out the different processes in Photoshop. To show you the steps to follow, we are going to use an image with a resolution of 6000×4000 and what occupies 7 MB.
reducing the quality
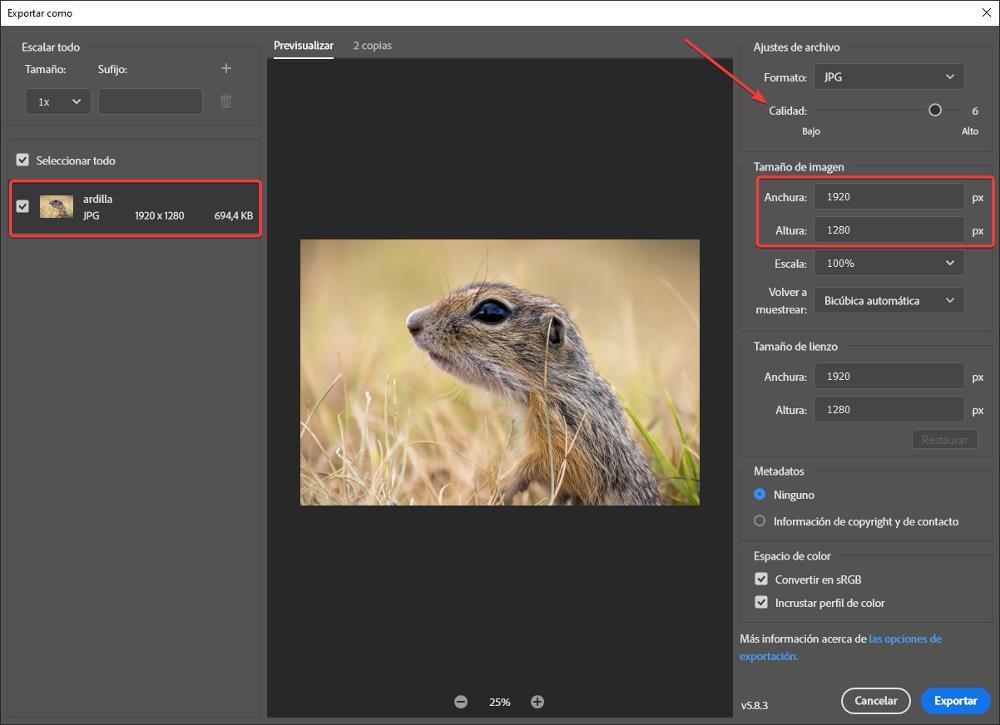
To reduce the quality of an image in Photoshop, without changing the resolution, once we have opened the image in Photoshop, we go to the menu File, Archive and then click on Export – Export As. In the window that appears below, click on 2 copies to display the original image and the final image after reducing the quality in a split screen. This way we can check the result before making the change. Next, we must select which of the two images we want to show the preview of the changes.
Next, we click on the + or – button located in the 2 copies panel to enlarge the image and better check the results that we are going to obtain by reducing the quality. Next, in the right panel, file settings, we place the mouse on the scroll bar to increase the quality, going up to level 7, or reduce it. As we move this slider, in the central panel, we will see what the final size of the image will be when selecting that quality. We do not modify the file format (JPG), since, as we have explained in the previous section, it is the format that offers us a compression-quality ratio.
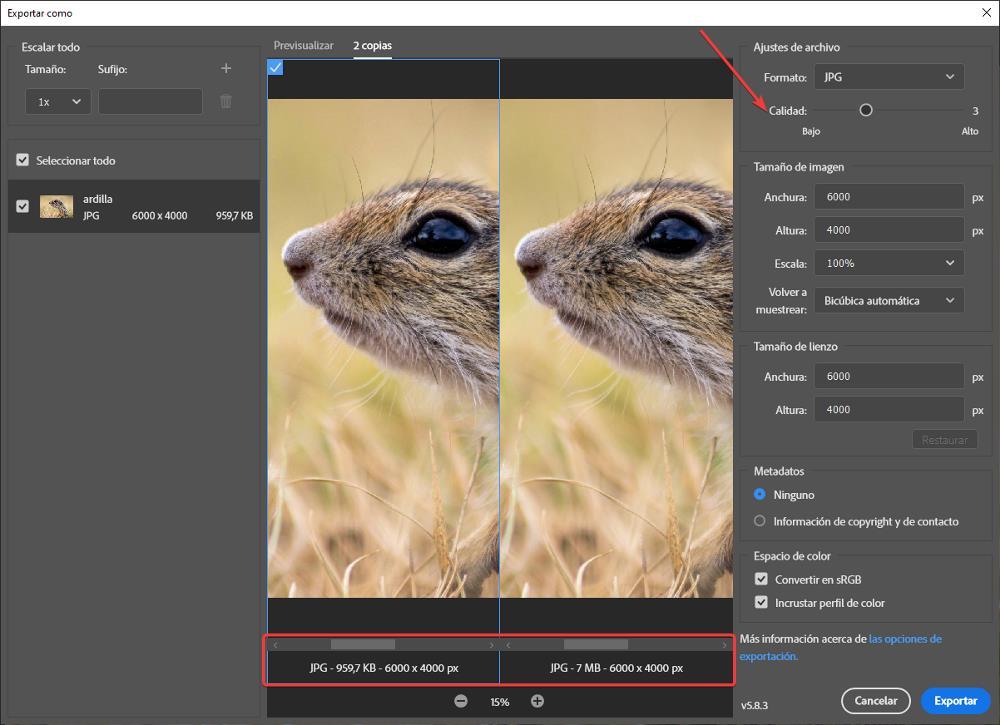
Going from level 6, the default of which the image opens with, to level 3, We went from a size of 7 MB, to just under 1 MB. Although in this shot you can’t see it very well, the image has barely lost some color in the front part of the image, becoming a lighter greenish tone than in the original image.
To save the file, we just click on Export and set the path where we want to save the file.
changing the size
If we want to change the size of the image to reduce the space it occupies in Photoshop, once we have opened the image in the application, we use the key combination Control+Alt+i and go to the section Width and we select the size we want the image to have and in the measurement, we use pixels. To give us an idea, the resolution of televisions and monitors is Full HD, that is, 1920 × 1080, an ideal resolution to display the image on full screen, avoiding pixels that only make the image look ugly. If we use the 1920×1080 resolution in this image whose original resolution is 6000×4000, we will go from a file of 7 MB to a size of 700 KB.

Regarding the size that the application shows us at the top of this window, we have to divide it by 100 to obtain the real value. The image in the original resolution of 6000×4000 pixels occupies 7MB (68.7MB/10) and after changing the resolution to 1920×1080, the final file size is 700KB (7MB/10). Once we have modified the resolution of the image, we go to the File menu and select Save. If, in addition to reducing the resolution, we also want to modify the quality, we will have to select Export – Export as and select the quality level we want. As we move the bar, the final space that the image will occupy will be shown, this data is real.
Modifying the format
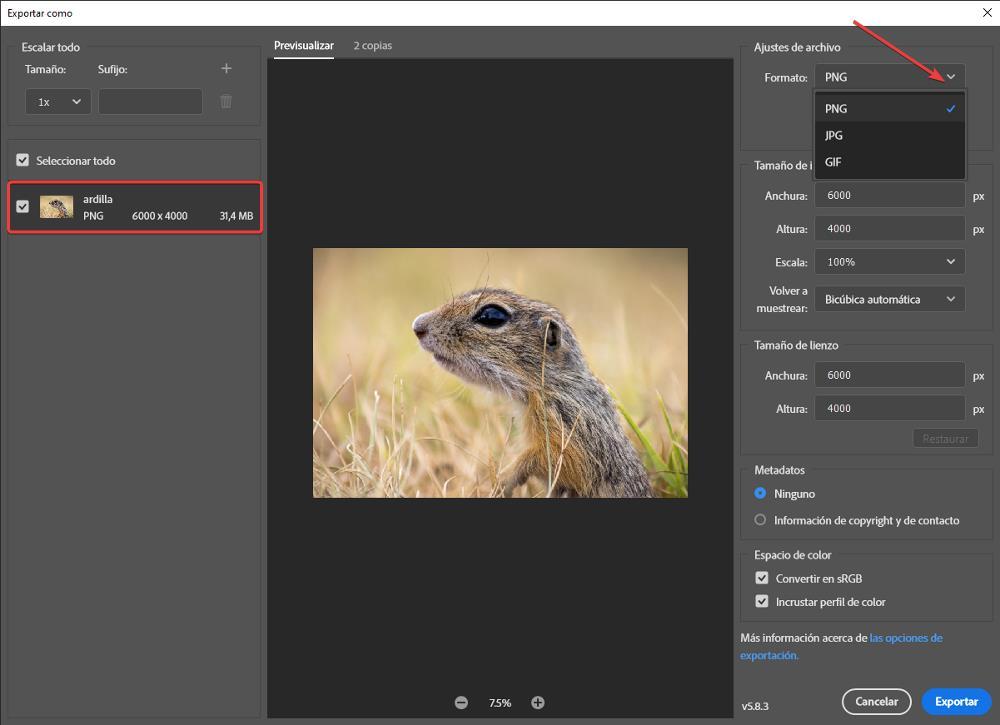
As we have explained in the Change format section, JPG is the format that offers us the best results in terms of quality-size ratio. In order to get an idea of the compression level of the image with which we have illustrated the examples in this article, we only have to verify that the original image with which we have worked was a file in PNG format, a file that before converting it to JPG format occupied 31 MB, more than 3 times the size in JPG format while maintaining the resolution. To change the format of this image, first of all, we have opened it with Photoshop and, then, we have gone to the menu File – Export – Export As. In the File Settings section, under format, we have clicked on the drop-down box to select JPG.
By modifying the format in the panel on the left, the final size of the file will be displayed according to the original resolution. If, in addition, we also modify the resolution, we will reduce even more the space that the image occupies, so the final space saving will be considerable.