When we install a new SSD it may be not be directly recognized by Windows. If this happens to you, do not worry, it is something that happens frequently and that we can solve in a very simple way.
However, please note that if the unit It is not identified in the BIOS of your motherboard, it is likely that you have a configuration problem, or that the unit is even defective.
In this article we are going to explain how to assign a drive letter to an SSD in Windows, assuming that said unit is properly recognized by the BIOS and that it does not cause any problems. The steps we must follow are very simple:
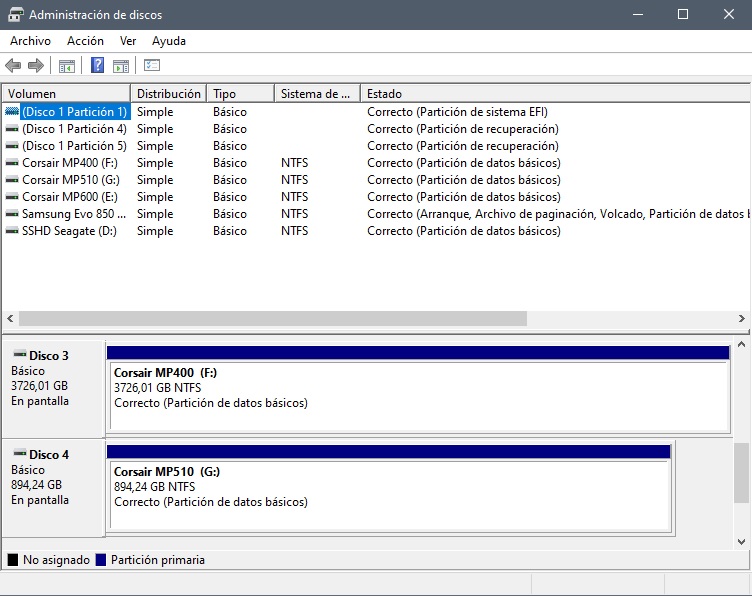
- We go to the taskbar and right click on the Windows icon. We choose the “Disk Manager” option.
- In the pop-up window that will have appeared, we go to the SSD unit to which we want to assign the drive letter, right-click on it and choose the option “change drive letter and paths”.
- The next step is to click on “change” if we want to change the letter that the SSD drive already had, or “add” in case it still did not have any drive letter assigned.
- We choose the new drive letter that we want to use, accept and that’s it. Keep in mind that a drive letter change may affect the proper functioning of previously installed programs, so we may be forced to reinstall them.
If you have problems and Windows does not recognize your storage unit, do not worry, follow the steps that you will find in this article and that They will help you solve this problem. If none of them work for you, and you have made sure that the configuration is correct, it is most likely that the SSD is defective, and you will have to process the guarantee in case it is still valid.