If our monitor is compatible with HDR technology, Windows allows you to deactivate it from the Windows configuration options (Win + i), clicking on the section System and then in Screen. In the left column, in the Windows HD Color section, click on Windows HD Setup Color and uncheck the box HDR and WCG.
Since Windows 11
If we want to deactivate the HDR option of the monitor, we must access the Windows configuration options (Win + i), click on System – Screen and, in the right column, we uncheck the box use HDR.
Delete color profile
Another section that we must review to find a solution to the display problem that our equipment presents is in the color profiles. To delete any control profile that we have established on the computer, we must access the Control Panel, whether it is Windows 10 or Windows 11.
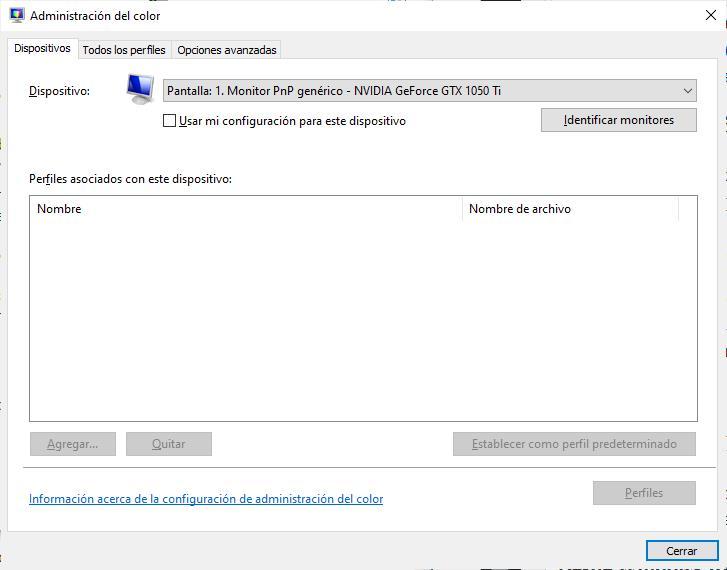
To access the Control Panel we will use the Windows search box. Next, in the search box we enter the term Color management and select the first result. In the window that appears, click on Devices, click on the drop-down box to select the monitor connected to our computer, which will be Screen 1: followed by the monitor model and the graph if we had a dedicated one. At the bottom, all associated profiles will be displayed if you have any.
To delete them, we just have to select the profile and click on Remove. Once we have eliminated all the color profiles established in Windows, we must restart the computer. When you restart your computer, Windows will display the system default color without any filters.
Disable color filters
It is also possible that the problem is with the color filters set on the computer, regardless of whether it is managed by Windows 10 or Windows 11.
From Windows 10
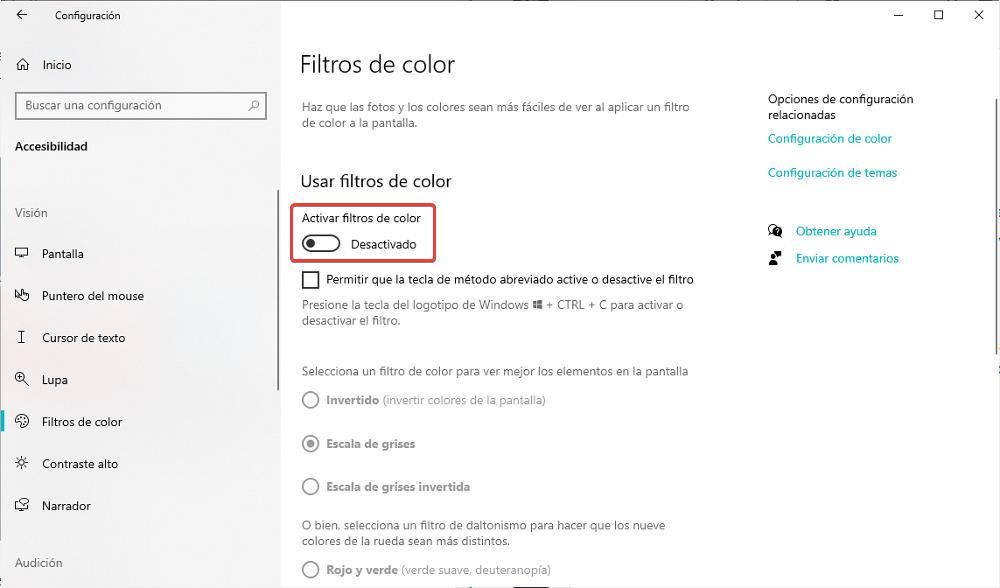
To deactivate the color filters in Windows 10, we access the Windows configuration options (Win + i) and click on Accessibility. Within this menu, we look for the Color filters option and deactivate the box Activate color filters available in the Use color filters section.
With Windows 11
To disable color filters in Windows 11, we go to the Windows configuration options (Win + i) and click on Accessibility. Within Accessibility, look for the Color Filters option and uncheck the box color filters.
Change monitor mode
If none of the options that we have mentioned above have managed to find the problem, it is likely that it is in the monitor settings. Some monitors include different display modes which, automatically, is in charge of modifying the colors that are shown based on some parameters that, in theory, are the best.
Whether we use a monitor or a TV connected to the computer, this option is found in the menu Image either picture mode and try the different modes available until you find the one that best represents the colors on the screen.
Update the graphics driver
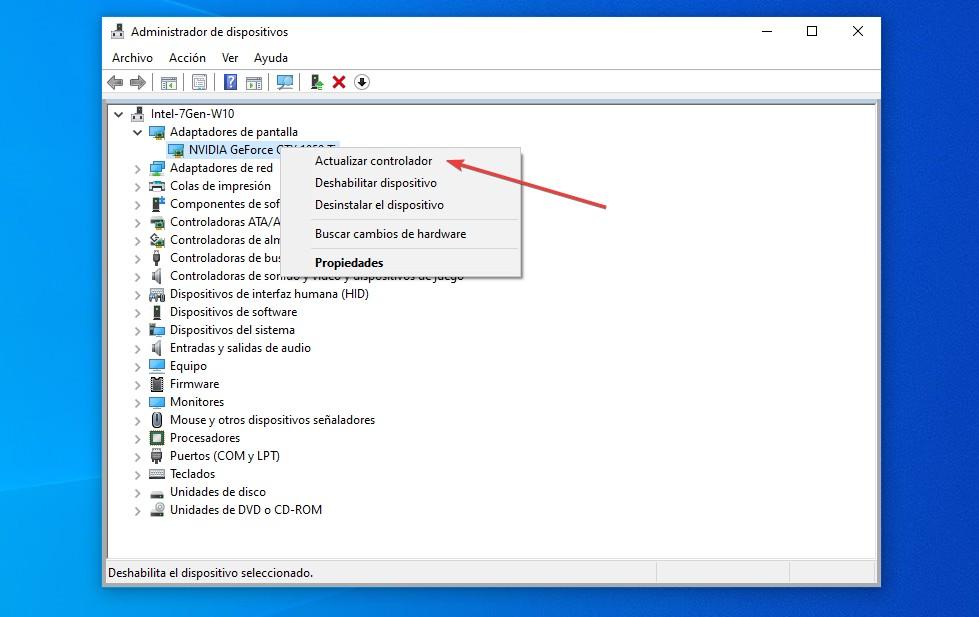
The first thing we should do whenever we have a problem with the image displayed by the computer is to update the graphics driver, whether it is a dedicated or integrated graphics. To do this, we access the Device Manager from the Windows search box and click on Display adapters to select the one that manages the PC’s video output.
Then, click on it with the right mouse button and select the Update driver option so that Windows checks the only driver for that component available in its database, downloads them and reinstalls it. Even if the driver is still the same, reinstalling this process should fix the problem.
Uninstall monitor drivers
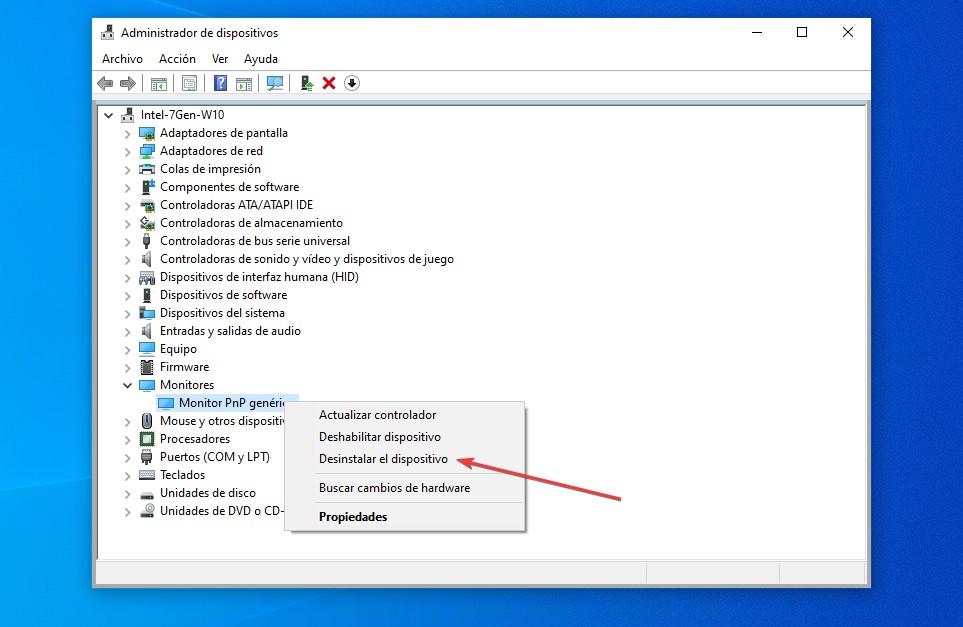
Another option that we should try is to uninstall the monitor driver. This process is similar to the previous one since we must access the Windows device manager, select the Monitors option and with the right mouse button select the Uninstall device option. As soon as you uninstall it, Windows will automatically reinstall it and the problem should be fixed.
screen flickers
Unlike VGA connections, which include screws to fix the cable, HDMI ports do not include any type of fixing to prevent it from falling off in the event of any movement and not making proper contact. If the image flickers on and off, it is because the HDMI, DVI, or USB-C cable has come loose slightly is not making proper contact with the motherboard / graphics card or with the monitor, so the solution to this problem is to make sure that both the video output of the computer and the video input of the monitor are correctly set.
Image is cropped
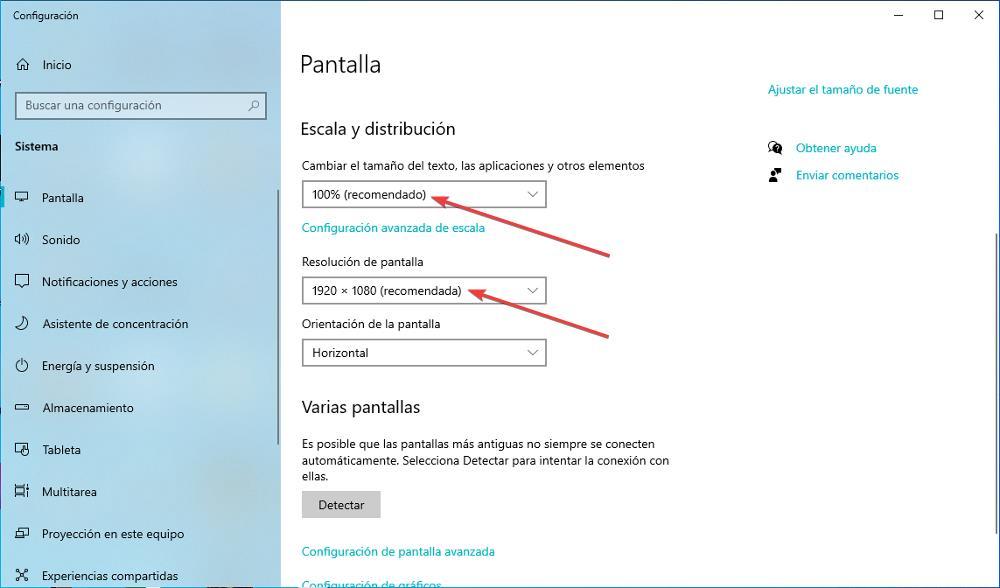
If the image displayed on the monitor or laptop screen does not correctly show the limits of the taskbar or the zomo image is displayed if we were zooming in, it means that we are not using the appropriate resolution. When we try to use a resolution greater than that allowed by the screen, although it is not usual, Windows enlarges the image to suit the resolution that we have indicated, regardless of whether the monitor is compatible with it or not.
To solve the problem, from the Windows desktop, press the right mouse button and select the option Screen settings. Next, click on the drop-down box shown in Screen resolution and select the recommended option. We must also check, at the top, if the Scale and distribution section shows the recommended value.
Verify that the problem is not hardware
The first thing we must check before carrying out any other operation is to make sure that the equipment works correctly, that is, that the problem is not with the monitor.
on a laptop
If it is a portable computer, we just have to check if, as soon as the computer’s start button is pressed, any type of image is displayed on the screen, be it the manufacturer’s logo or any other information, but it shows something.
If it does not show any image, everything indicates that the problem is either the monitor or the graphics card. In any case, as it is a hardware problem, the cheapest solution, strange as it may sound, is to buy another computer. Repairing a laptop, like any other electronic device, is a process that takes a long time and, in addition, the spare parts are very expensive.
Which, yes we can do, if our economy does not allow us to buy a new computer, it is to make sure that the problem is not with the graphics card. To check it, we just have to connect the HDMI output of the equipment to the TV and check if the signal is displayed. If so, we will only need a monitor connected to the laptop to continue using it.
With a desktop computer
On a desktop computer, it is much easier to make sure since we only have to connect the monitor to a device with hdmi output and check whether the video and audio signal is displayed. If it is not shown, we can either throw the monitor in the trash or take advantage of the warranty period if it still has it. On Amazon we can find 24-inch monitors for just over 70 euros.
But, if the monitor works correctly, the problem is in the Graphic card. If the computer has a dedicated graphics card, we must use the video output of the motherboard and check if a signal is displayed. If the video output from the motherboard shows an image on the monitor, the problem is with the graphics card and the solution is the same as always: buy a new one.
