The indexes in a book, Word document or even in a PowerPoint, allow us to quickly view all the available content and, when it comes to a digital format, access directly by clicking on each of the titles, without being forced to go to the page by sheet until we find the one we are looking for. Next, we show you how create an index in powerpointthat is, how to build the structure with the corresponding links to, finally, give it our personal touch if we consider it convenient.
To create an index in PowerPoint, we are not going to use any of the tools that this application offers us, so we can follow these steps, regardless of the version of Office that we are using.
When to create an index?
Regardless of the purpose of the presentation (public display or sharing with others), it is always a good idea to create an index. In the case of an exhibition, it will allow us to quickly access all the content if, for any reason, we are forced to consult it. If it is a presentation that we are going to share, the receiver will be interested know at a glanceavailable content and quickly access the one that interests you most.
If the presentation is made up of 3 or 4 sheets, it is absurd to waste time creating an index, since, when opening the document, a thumbnail of the slides is shown in the right column, which allows us to get an idea of its length. In this case, all content is important, or should be.
Create an index in PowerPoint
First of all, for work in a more graphic and simple way, we go to the ribbon, specifically to the View section and select Normal. This mode shows on the right side a thumbnail of all the slides in their order while on the left side the content of the slide that we have selected is shown.
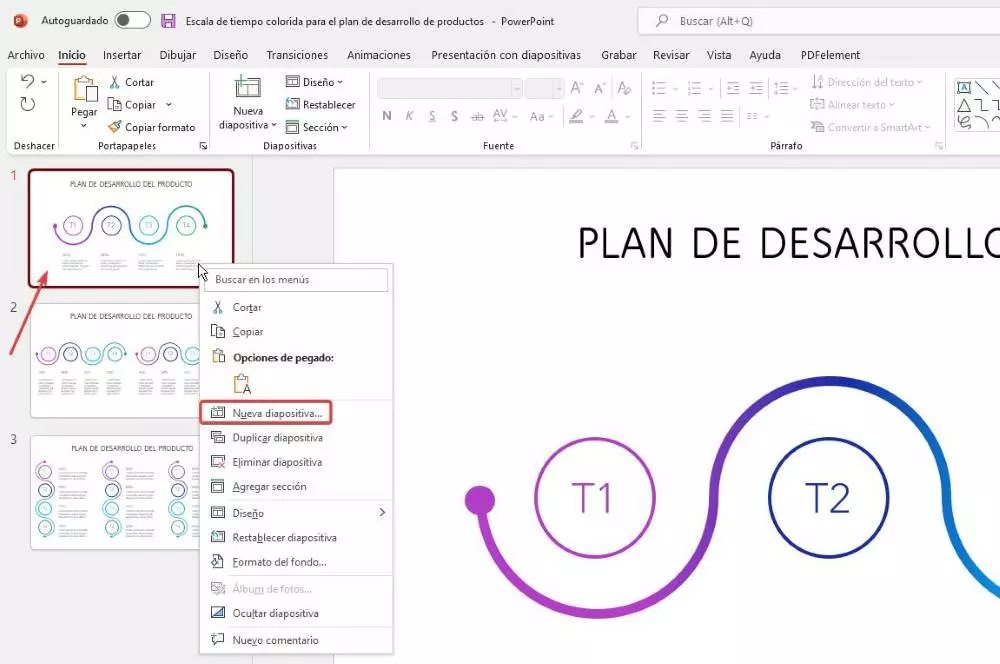
The first thing we must do, once we have opened the PowerPoint document, is select the position where we want to add the index. As a general rule, this is usually included in the second or third slide to be easily accessible without being forced to access the end of the document.
To add a new blank slide, we must select the immediately previous slide, press the right mouse button and select new slide. At that time, a new blank slide will be added below the one we have selected. If we make a mistake in position, we can keep the slide pressed with the mouse and move it to where we want.
We can then copy the logo or slide theme from another slide or change the background so that the table of contents do not remain as an addition that we have included in a forced way and that is in line with the design of the presentation.
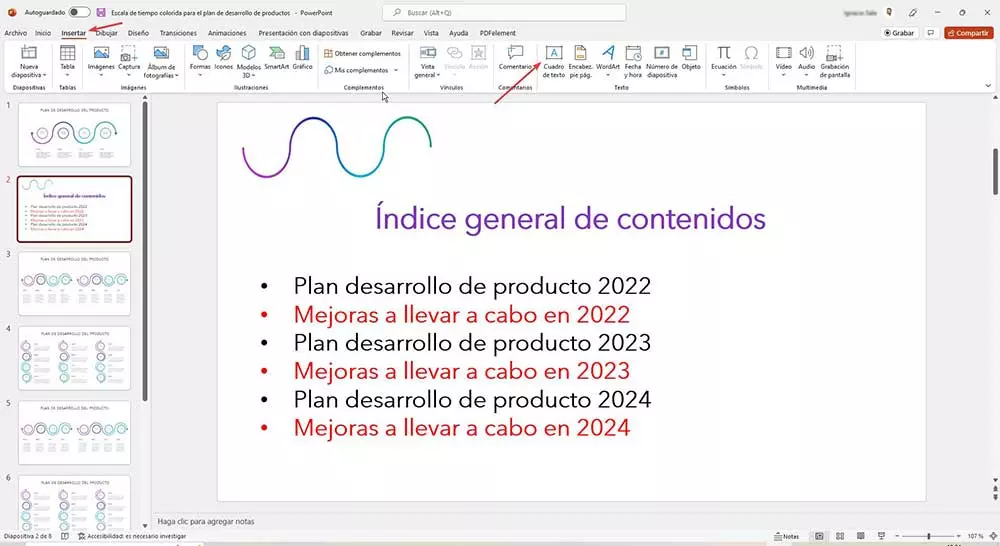
In the next step, we click on the Insert menu on the ribbon and select text box. We create the text box on the slide where we are going to create the index and which we are also going to use to add shortcuts to each of the sections that make it up.
Once we have created the table of contents, it is time to link each of the titles of the table of contents with the corresponding slide. The first thing we must do is select the text where we want to create the link.
With the text selected, click on the button Link displayed on the Insert ribbon. Next, in the window that appears, click on Place of this document. In the section on the right, we click on Slide titles and select the slide that will be displayed when clicking on the text that we have selected.
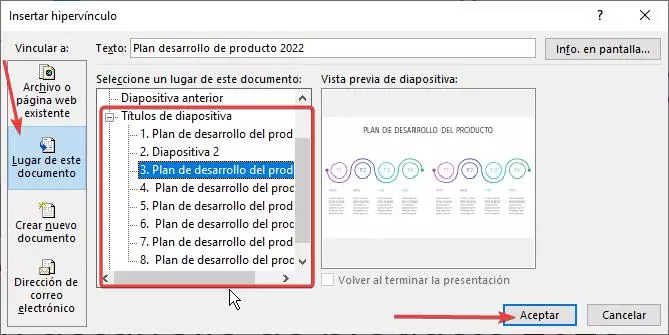
Clicking OK will display the index with the Underlined text in blue, indicating that it includes a link, like any web page where we find text linked to other websites.