The cleaning the inside of the PC it is a maintenance task that should be periodic for everyone, since otherwise the dust it will be deposited inside the PC causing potential noise and temperature problems. But, when it comes to doing a thorough cleaning, you should keep in mind that the motherboard is perhaps the most delicate element due to its large number of components, ports and connections, so how should you clean motherboard so as not to spoil anything?
Cleaning the motherboard is not a very complicated task, but it is much more laborious than, for example, cleaning a simple fan. It has a multitude of components, connection ports and sockets, which means that there are also a lot of nooks and crannies where dust gets in and is hard to get out. Many of you might think that plugging compressed air into the board will be enough, but in most cases not only is this not the case, but it is also somewhat counterproductive.
The art of cleaning the motherboard properly
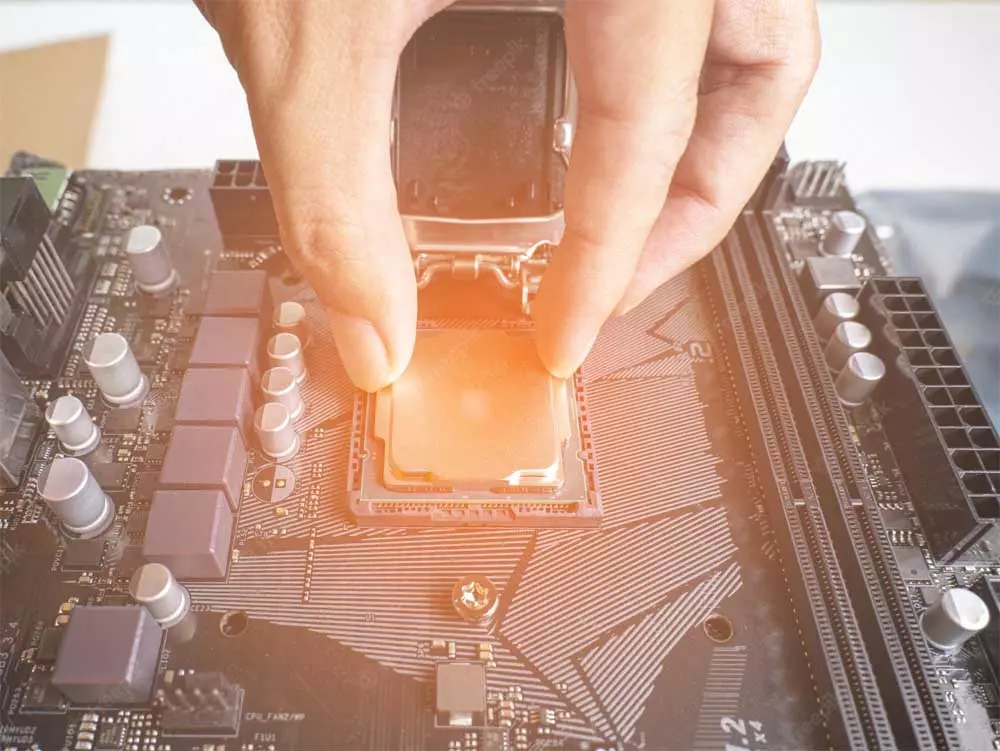
Let’s start with the obvious: to properly clean your motherboard, you’ll need to completely remove it from your PC and disconnect any cables or devices connected to it except for the processor (and that includes the processor heatsink too). . We do not recommend disassembling the processorOtherwise, the dust and dirt that we are going to try to remove from the board could end up in the socket, so it is better to leave the processor mounted to avoid this.
That said, with everything already disassembled, the first step would be to try to remove most of the dust with the help of a compressed air spray (do not use a industrial compressed airits pressure is too high and you could damage something) or a vacuum cleaner, but in any case always being careful to place yourself at a certain distance from the base plate, since we repeat that too high pressure (either expulsion as in compressed air or suction in the case of a vacuum cleaner) could damage the motherboard components.
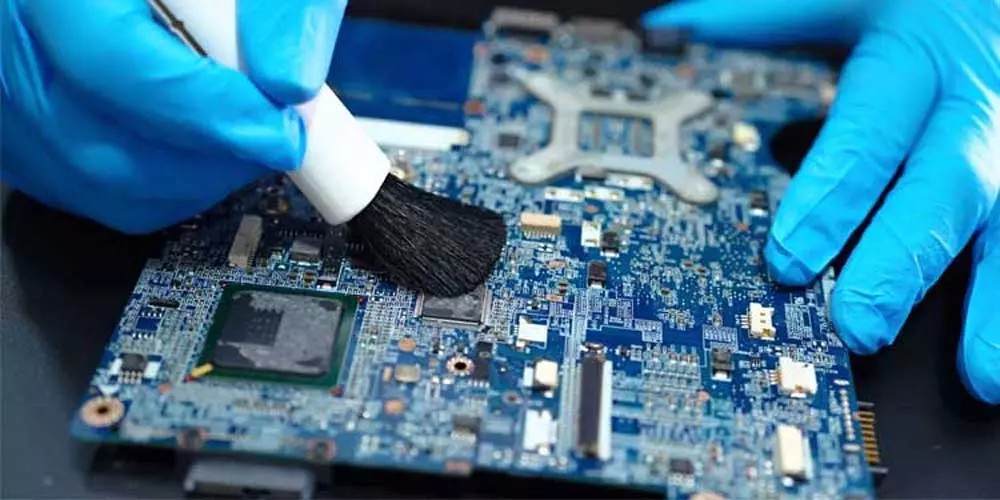
With this you will have managed to get rid of approximately 80% of the dust and dirt, but it is not enough if you want to make the motherboard look like new, so the next thing you should do is get a soft synthetic hair brush. In other words, the paint brushes They are NOT recommended as the bristles are too stiff, but one makeup brush Yes, she would be ideal for this job. The size and shape of you depends, but its thing is that the area of the bristles is about 2-3 centimeters and that its shape is elongated, to be able to put it through the nooks and crannies of the plate.
With the dry brush, make a pass over the entire surface and sockets of the base plate, front and back, with smooth movements always in the same direction and never squeezing, simply passing the brush over it. We recommend that you support the motherboard diagonally on a cloth so that it is not damaged and always move downwards, so that the dust falls towards there.
Once this is done, you will have already gotten rid of 95% of the dust and dirt on the motherboard, but there is one last step to take if you want it to be as clean as possible. Prepare ear swabs and isopropyl alcohol, lightly dip the head of a cotton swab into the alcohol and rub it over RAM sockets, PCI-Express sockets, etc. Since the motherboard is usually mounted vertically in a PC case, the tops of these sockets tend to collect a fair amount of dust, so it’s a surface you’ll want to pay special attention to when cleaning.
Once you’re done, you’re ready to mount the motherboard back into your computer, reconnect everything, and get going.