One of the most used applications in the world to edit photos is Lightroom, and without a doubt, one of the reasons is how easy it is to be able to use the different presets that you can add or create yourself. Well, that’s exactly what we want to tell you in this post, how you can add or create presets in Lightroom, whether you have a Mac, an iPad or an iPhone.
What is a preset?
Before going fully into everything we have to tell you in this post, you may be in the position of not knowing what a preset is, and the first thing we want to do is answer this question. A preset, to which you can also call it filterit is not more than a number of editing settings that are applied to a photograph.
In Lightroom there are already presets that are installed by default and that you can freely use with all your photos. However, being an app focused on a somewhat more professional audience, it gives you the advantage of being able to create your own presets or add those of others users, as many video editing professionals share or sell these self-created presets.
So you can create them
From the outset, surely when you open the Lightroom application, it will seem to you that it has a very professional look and that it can be difficult to use it with ease. The reality is very different, and in a few minutes you can take control of it. Among all the actions that this professional photo editing app allows you to carry out, without a doubt one of the star functions is the possibility of both adding presets and creating them, which is what we are going to focus on right now.
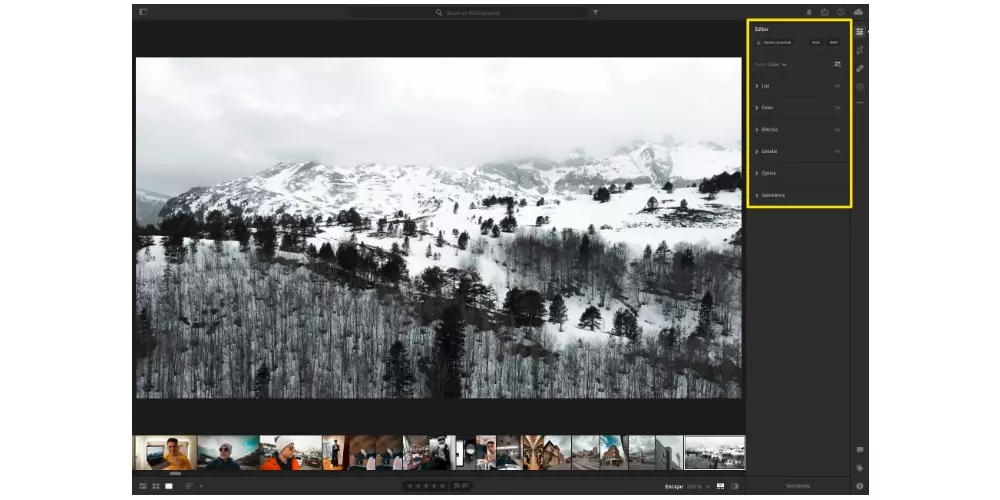
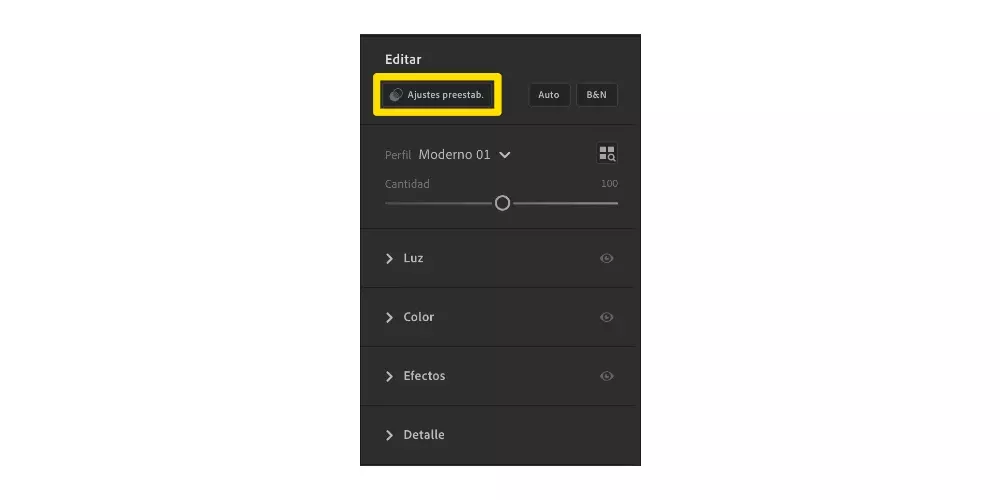
As we have mentioned before, a preset is nothing more than a set of adjustments that are applied to a photograph. The advantage of being able to create them is that each user has creative freedom to be able to add as many presets as you want and with the settings you want to have in each of them. Therefore, the first step and more important to create a preset is to apply a series of adjustments to a photograph, that is, edit a photo that you’ve imported into Lightroom. Here is a list of the different parameters of a photograph that you can edit in Lightroom.
- Light
- Exposition
- Contrast
- illuminations
- Shades
- Whites
- Blacks
- dot curve
- Colour
- Temperature
- Hue
- Intensity
- Saturation
- color mixer
- color grading
- effects
- Texture
- Clarity
- clear haze
- Bullet point
- Granulated
- Detail
- Focus
- noise reduction
- color noise reduction
- Optics
- remove chromatic aberration
- Activate lens corrections
- Eliminate fringes
- Geometry
- right
- Distortion
- Vertical
- Horizontal
- Rotate
- Appearance
- Scale
- X offset
- Y-offset
on Mac
Once you have finished editing and modifying all the parameters that you wanted within your photograph, it only remains to carry out the corresponding steps to be able to save those adjustments within a preset, in such a way that when you want to edit a photograph with those same adjustments, as you just have to use it and you don’t have to be editing the photo again. The steps on Mac are as follows.
- Choose the photograph.
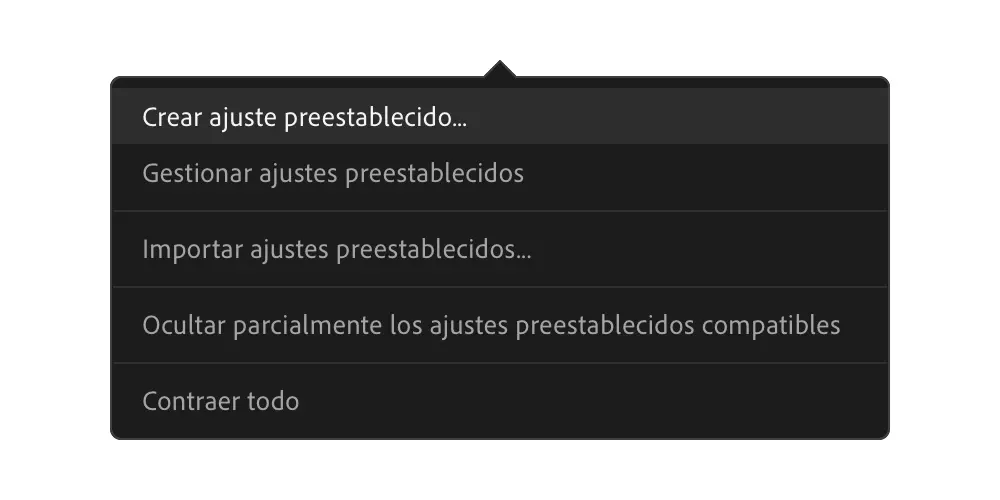
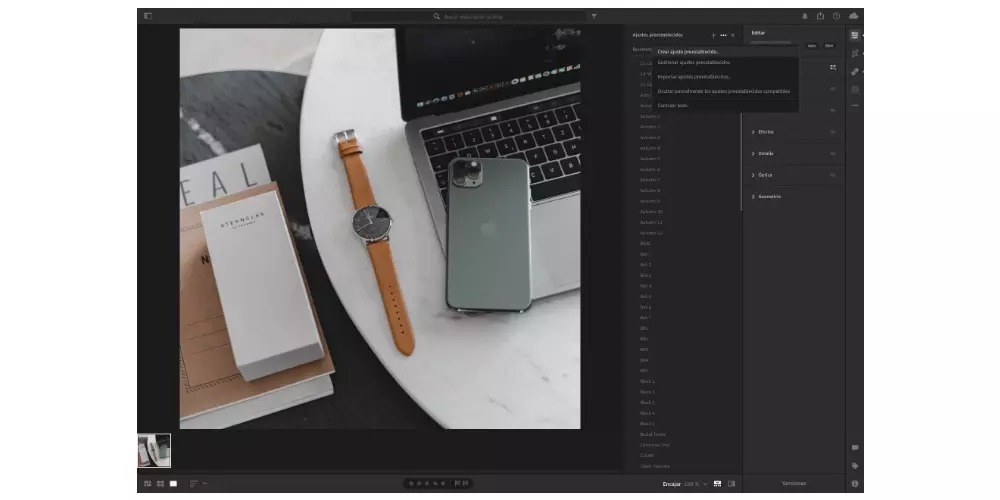
- click on Presets.

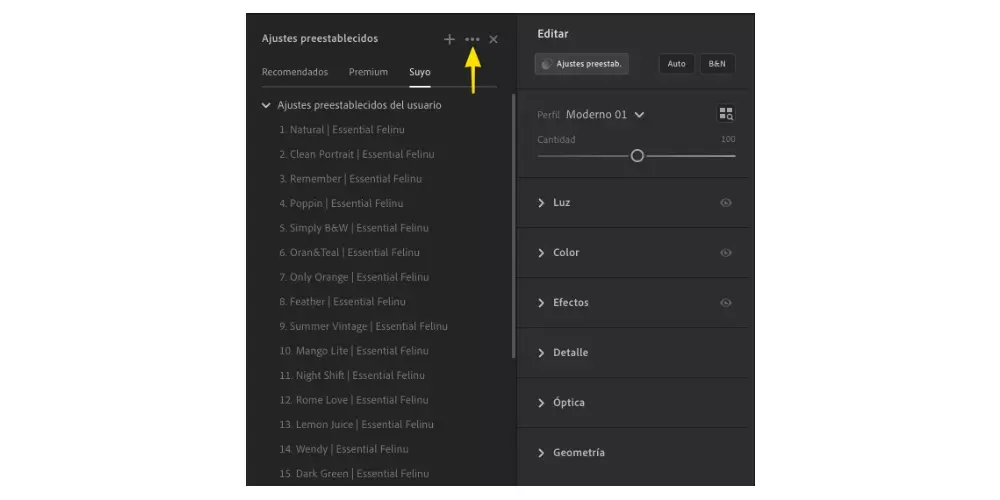
- Click on the three points that appear in the displayed menu.
- Choose “Create preset«
- Write a name for your preset.
- Click “Save”.
On iPhone and iPad
In the same way that on Mac you can create presets of any edition that you have done to a photograph, this process can also be carried out from the iPhone or the iPad, and in addition, the steps are exactly the same on both devices. As you can see below, it is extremely simple and once you have edited the photo, to generate a preset with those settings you just have to follow the following steps.
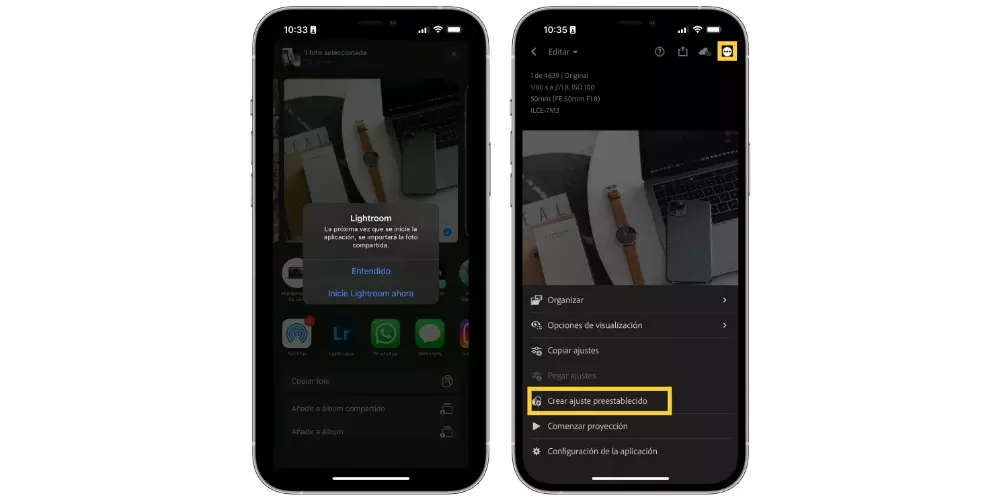
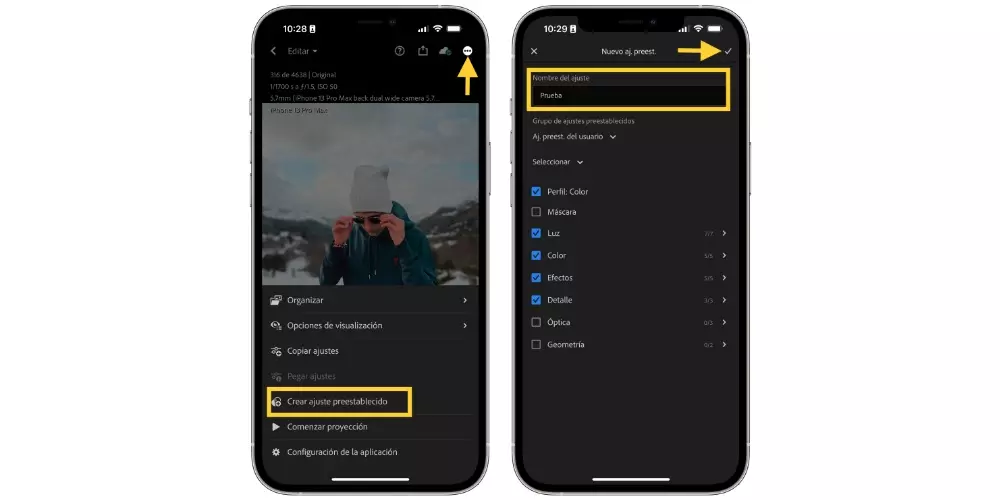
- Select the photo which has the settings you want for your preset.
- Click on the three points located at the top right.
- Choose “Create preset«.
- Enter the name you want to give the preset.
- Press the tick located at the top right of the screen.
Steps to add a preset in Lightroom
One of the great points in favor of this application is that it allows you to edit like a probut without really needing to be, since for it so you just need the presets used by photo editing professionals. Fortunately, there are many who share or even sell to the public the presets that they themselves use for their work, so once purchased, you just have to add them in Lightroom.
The steps to do it both on Mac and on iPhone or iPad are really simple, but you have to keep something in mind, and that is that in order to get those editing settings, you will need to have a photo in RAW format have those presets. Usually what the professionals do is to provide different RAW photos that contain the different presets that the user has paid for or simply downloaded.
Do it on the Mac
Once you have obtained the files in RAW format that contain the editing settings that you want to obtain to save in a preset, the steps to be able to complete this task do not differ too much from the steps that we have explained previously to add a photo preset that you have already edited yourself. Here we explain how to do it.
- In Lightroom, click “add photos«.
- Select the file containing the edit settings you want to save.
- Click on «review to import«.
- Click on «Add 1 photo«.
- Display the menu of Edit.
- click on Presets.
- Click on the three points that appear in the displayed menu.
- Choose “Create preset«.
- Write a name for your preset.
- Click “Save”.
Do it on the iPhone and iPad
We now move on to the iPhone or iPad, and really the process is exactly the same, or at least very similar to what we just told you about for Mac. You just have to have the file or photograph accessible in RAW format, either from your gallery Photos or from the Files app. Once you have the photograph well located and accessible, the steps you have to carry out are the following.
- Select the photo which has the editing settings.
- Click on the icon to share and select light room.
- Click on «Launch Lightroom now«.
- open the photo that you just imported into the app.
- Click on the three points located at the top right.
- Choose “Create preset«.
- Enter the name you want to give the preset.
- Press the tick located at the top right of the screen.