We will also need a computer managed by Windows, Linux or macOS to install Raspberry Pi OS, the Linux operating system that is responsible for managing the operating system.
Install Plex on a Raspberry Pi
Once we have everything we need to create a Plex server on a Raspberry Pi, we can get to work following, in the established order, each and every one of the steps that we show you below.
Install Raspberry Pi OS
If you have already installed Raspberry Pi OS on your device, you can continue to the next section. First, we are going to install the Rasberry Pi OS on a memory card. Rasberry Pi OS is the operating system that we are going to use to manage the device and was previously known as Raspbian.
To install the operating system, we visit the download section of the official Raspberry website by clicking on the following link and download Raspberry Pi Imager for the operating system that we are using (Windows, Linux or macOS).
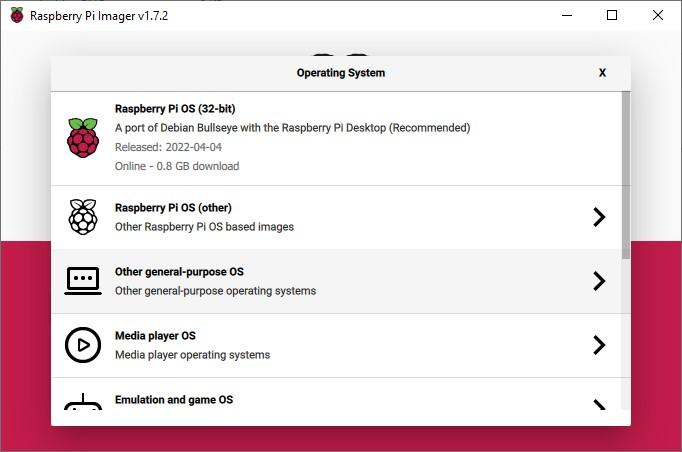
Next, we install the application and run it. Next, click on CHOOSE OS and select which version of Linux we want to install on the device. Among all the options shown, we select the first recommended option Raspberry Pi OS (32-bit).
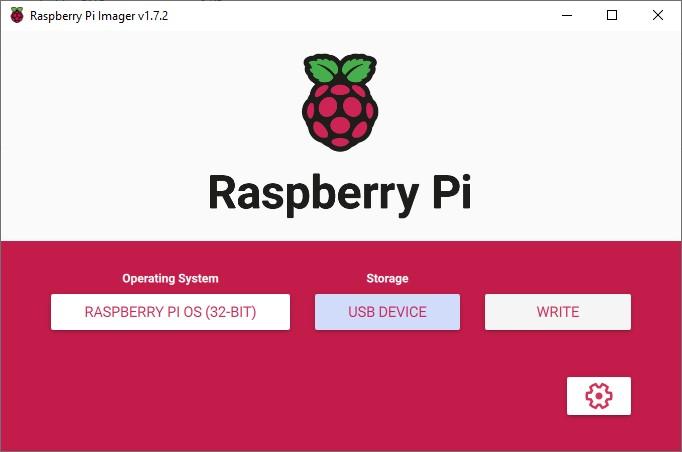
Next, we insert the memory card into an SD reader connected to our computer and click on CHOOSE SD CARD to select it. Finally, we press the WRITE button to start the installation process of Raspberry PI OS on the memory card, the memory card that we will use to start the device.
Update Raspberry Pi OS
The first thing we are going to do is make sure that the operating system has all the available updates installed up to that moment by entering the following command from Terminal:
sudo apt-get- update
Although the most modern versions already include the HTTPS transfer protocol, necessary to download the files, it never hurts to check that it is available and in the most recent version using the code:
sudo apt-get install apt-transport-https
In the next step, we need to add the dev2day repository where the Plex installation files are available. Previously we need an encryption key 0 that we obtain by entering the following command in Terminal:
wget -0 - https//dev2day.de/pms/dev2day-pms.gpg.key | sudo apt-key add -
Next, we install the dev2day repository
echo "deb https://dev2day.de/pms/ jessie main" | sudo tee /etc/apt/sources.list.d/pms.list
Finally, we update the list of packages
sudo apt-get update
Install Plex Media Server
After updating and installing the corresponding repositories, it is time to install Plex Media Sever on the Raspberry Pi, an installation that we can carry out by entering the following command from Terminal:
sudo apt-get install -t jessie plexmediaserver
Press the Y key to confirm that we want to download. In the next step, we need to configure the application to run through our user account, that is, give permissions to our user, using this command:
sudo nano /etc/default/plexmediaserver.prev
In the document that is displayed on the terminal screen, we must look for PLEX_MEDIA_SERVER_USER=plex and replace plex by pi. That line should look like this: PLEX_MEDIA_SERVER_USER=pi
To exit this window, we press the key combination Control + X and press Y to confirm that we want to save the changes. Next, we restart the Plex server with the command:
sudo service plexmediaserver restart
Set up Plex Media Center
At this point, we are going to configure the Raspberry Pi with a fixed IP of our local network so that it can be located by all the devices with which we are going to access the content stored inside. To know the IP that the device is using, we use the command
hostname -I
We copy the IP address (starts with 192 followed by 3 more numbers separated by dots) and enter that address in the cmdline.txt file with the following command:
sudo nano /boot/cmdline.txt
At the end of the file we write IP=IP address. We close the file using the Control + X key combination and save the changes by pressing the Y key. Finally we restart the Raspberry Pi using this command:
sudo reboot
How to set up and access Plex server
Once we have mounted the Plex server on the Raspberry Pi, the next step we must take is to add content to the application so that it is accessible from the entire network. To do this, we need a hard drive where both the movies, as well as the images and music that Plex will be responsible for distributing in our home are stored.
Add content to Plex Media Center
To share the multimedia content of the hard drive connected to the Raspberry Pi, the first thing we must do is access the server using a web browser with the following address
http://IP address:32400/web/
The first time we visit this address, the web server will invite us to create an account on this platform in order to associate the server with our account and make it available on all the devices we use to access our server. If we already have an account, we can use it without having to create a new one.
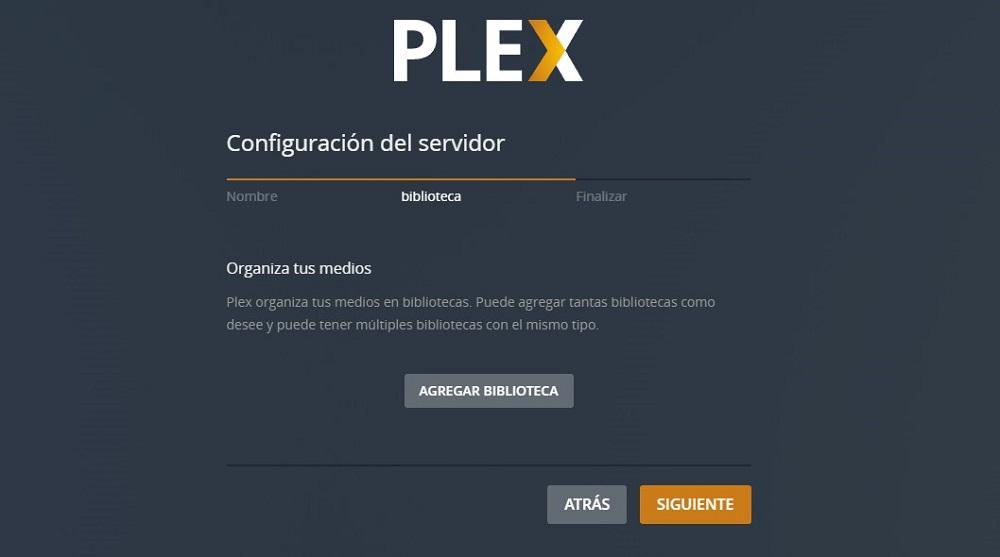
Next, we click on add library ay select what type of content we want to add: movies, TV shows, music, photos or other videos and click on next.
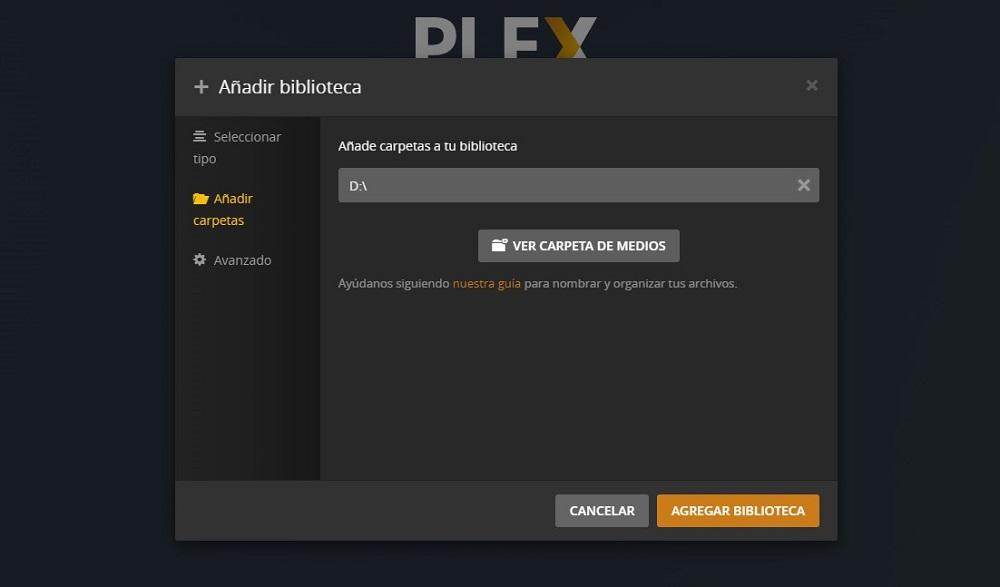
Next, click on View media folder and we go to the folder where the content we want to share through Plex is located. Finally, click on Add Library.
We must carry out this process with each type of content that we want to add. In this way, when accessing the server, the type of content available is classified in those categories. In addition, if it is a movie or television series, Plex will show both the cover, the plot and the cast, as if it were the IMDB movie file.
Access content
Once we have downloaded the application on the device from which we want to access the content, the first thing we must do enter your Plex account details that we created in the previous section. Automatically, the server that we have created and that is associated with our account will be displayed.
While on some platforms the application is completely free and does not require any steps, on mobile devices and tablets it is necessary to use the purchase within the application to use it.
Unlike other platforms, there is no need to pay a monthly subscription to access our content. Plex also offers access to exclusive content available via streaming in both audio and video format through Plex Pass, a subscription for the use that we are going to give you is not necessary.