Currently there are various ways in which a hacker could try to attack us through e-mail. Phishing or malware hidden in attachments could be an example. But it is not only that, sometimes we suffer spam or junk mail, which causes us loss of time and sometimes stress. The vast majority of emails that cybercriminals send are automatically blocked by the anti-spam filters of Gmail or Outlook, among others, however, it is possible that some emails “escape” these filters, and reach our emails classified as spam (something very normal) or directly to our inbox as a legitimate email, in the latter case, it is where we are most at risk because it is supposed to be a legitimate email that has passed all filters.
Therefore, if we proceed to trace an email to its origin we can get to know who is behind that email. It can also be used to ensure its veracity or use it to block a source that does not stop sending Spam to our inbox.
Find out the sender’s source IP address in Gmail
Gmail is undoubtedly one of the most popular email services. At the moment we receive a message, as in the vast majority of email providers, it will not show us a complete header with all the information. That means that, in order to obtain all the data, we are going to have to follow a series of steps.
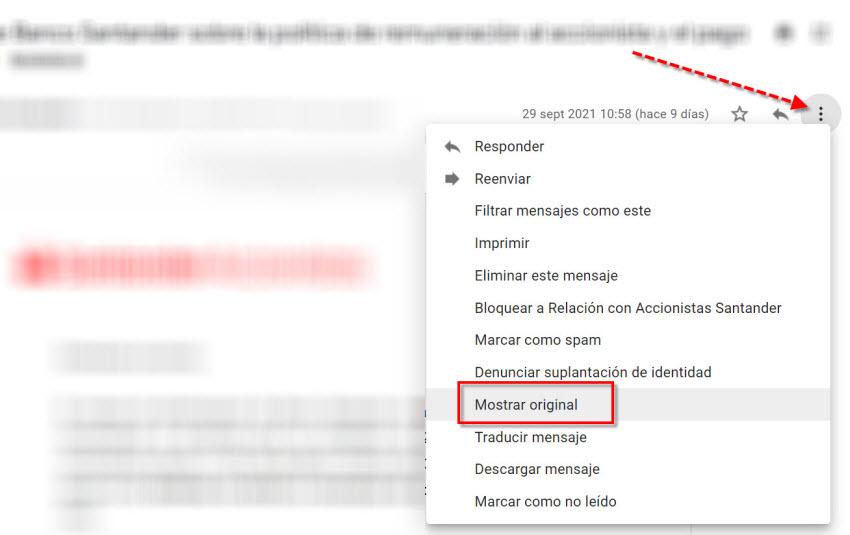
The first thing we have to do is open that email from which we want to obtain information. Once we have entered we click on the button with the three vertical points that you have indicated with a red arrow. Next, what you have to do is select Show original.
If we want to trace an email to find out the IP address of the original sender we have to go to the first Received in the full header of the email. Next to the first line “Received” is the IP address of the server that sent the email. In this case the IP we are looking for will appear as X-Originating-IP or also Original-IP. A quick way to do it in Windows is to press the F3 key, which is the one used to do searches. This is the result we have obtained:

In the hypothetical case that these two forms of text do not appear, this means they probably used an external encryption client or an anonymous service to hide your identity.
How to trace an email to its source IP in Outlook
In the case of Outlook, the process of tracking an e-mail is practically identical. What we have to do is open that email and go to More Actions, which is on the right, at the top and represented by three horizontal dots.
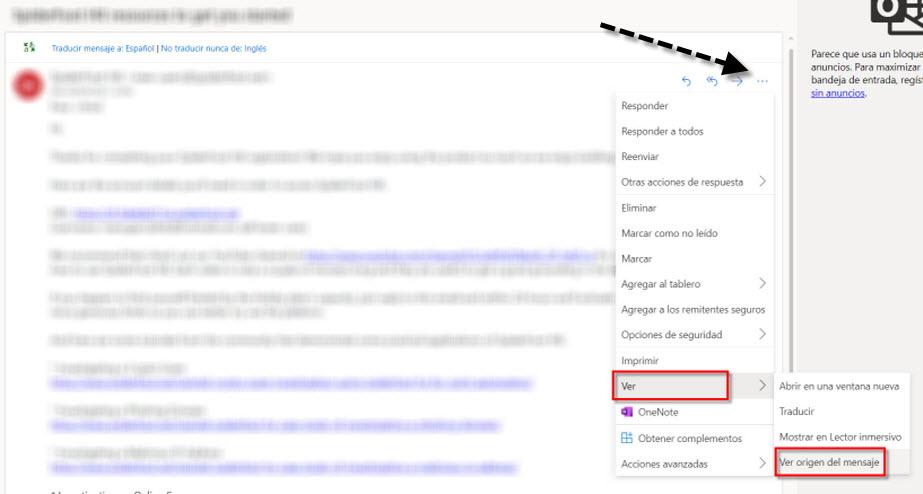
Once here we look for the option Watch, See message origin. Then, when we click, a window will open where we can see all the detailed information. Here what we have to do is look for the option Sender IP and if I was not try with X-Originating-IP. These are the results in which after tracking an e-mail we can discover its IP of origin.

As in the previous case, if those indicated values do not seem, this means that the safest thing is that they have used an external encryption client or an anonymous service to hide their identity.
Other information that appears in the header of an email
Thanks to the header we have seen that an e-mail can be traced back to its source IP address. However, through the header of Gmail or other email clients we could obtain more information.
For instance, Reply-To it would be the address to which the response is sent. Instead, desde It indicates the sender message, something that in many situations is easy to forge. Then we have Content type which is what makes our browser or email client know how to interpret the content of the message. As to MIME-Version informs us of the standard email format in use. Its usual version is usually 1 .0.
Then we have Subject, which refers to the subject. About To what it does is inform the recipient or recipients. Another one is DKIM-Signature, which is what authenticates the domain from which the mail was sent and thus can be protected against identity theft. In case you don’t know, DKIM comes from Domain Keys Identified Mail.
On the other hand, Received It informs us about each server through which that email has passed before reaching our email inbox. We also have Received-SPF, which is part of the e-mail authentication process. Finally, we have Authentication-Results that shows us a record with all the checks you have made.
What can we find out with that IP that we have obtained
After tracing an email to try to figure out its source IP address and get it, it’s time to see what we can do with it. A simple IP can offer us more valuable information than at first one could foresee. Therefore, what we are going to do is go to the website of What is my ip in its geolocation section, for which we will click on this link. Then we will see a screen where the only thing we will have to do is enter the public IP that we obtained. Here’s an example:
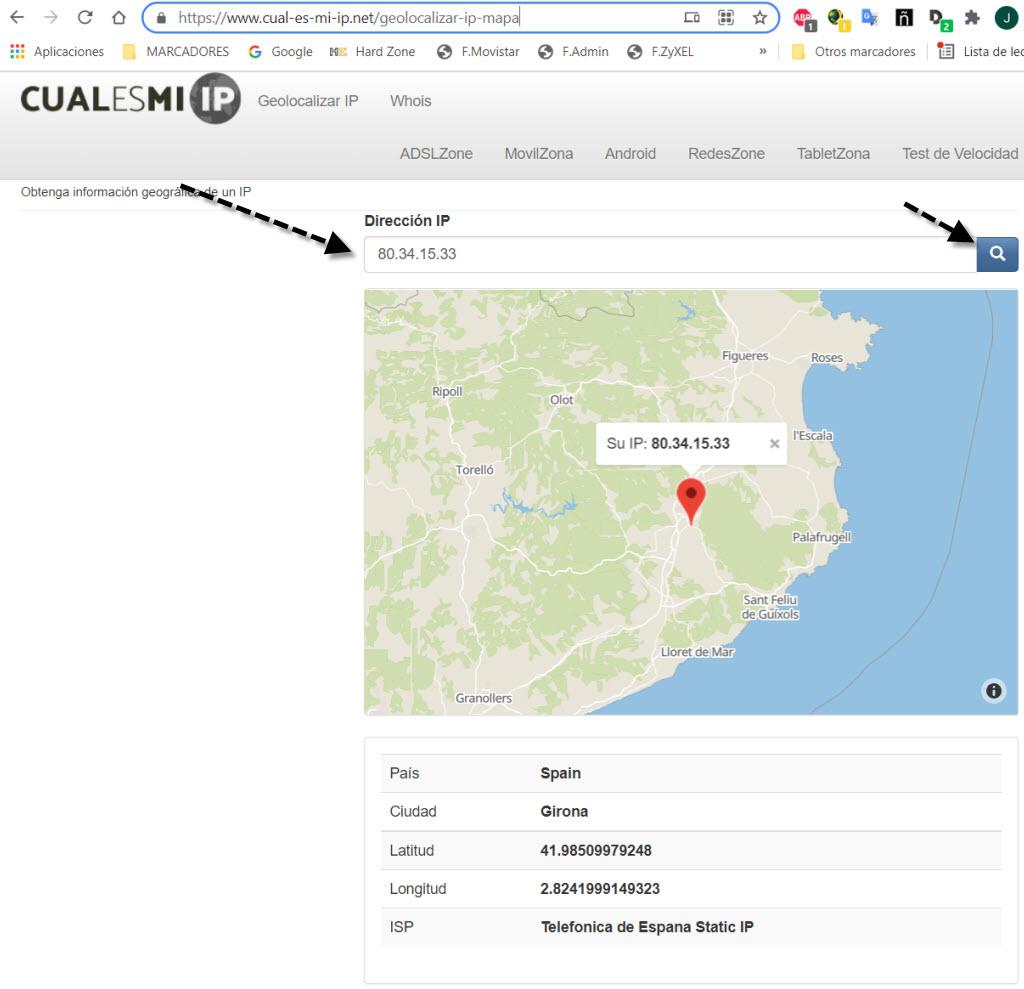
As you can see, we can obtain such relevant information as country, city and Internet provider. This can sometimes help us to determine if the e-mail we have received is true or false. On some occasions, public IP addresses of different providers and even a mail server will appear, in these cases the origin that we can investigate is only that IP from where the email was sent.
We hope that with these instructions you will be able to trace the origin of an email correctly, as you have seen, it is quite easy to do it through the headers of the received email.