The first thing we need to know is that Excel It is part of the Microsoft office suite, Office, which in turn integrates with other very popular programs. Here we find Word or PowerPoint that sometimes complement each other, as we shall see. In the case at hand, we are going to create an Excel document that will help us create a sequence of labels, for example, for later printing. The use of these results that we are going to obtain will depend on the needs that we have.
Adapt the Excel sheet to the label data
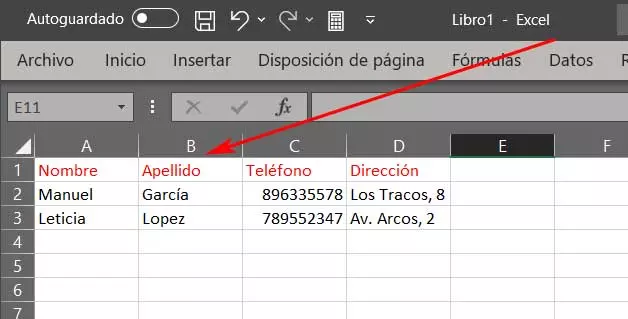
As you can imagine, a very important element here is the data that will be part of these labels. Therefore, to achieve the objective that we mentioned, we open a blank document in the aforementioned program and then type the headers that we will use in the first row of the spreadsheet. Once we have defined the headers that we need for the labels, we will have to fill in the corresponding data.
As you can imagine, except for the header row, the number of remaining rows will correspond to the number of labels needed. Once we have all the data entered, we can save the excel file in its default format, XLSX. Next, we are going to open the text editor that is part of the same office suite and that we mentioned earlier, we are talking about the popular Word.
Associate data to labels from Word
Once we have created the spreadsheet that we mentioned earlier with its corresponding format designed in Excel, we move on to Word. At the top of the main interface we opt for the option to Correspondence menu, where on the left we find the Labels button. This will allow us to create these elements that we are talking about in these lines, based on the data of the file created previously.
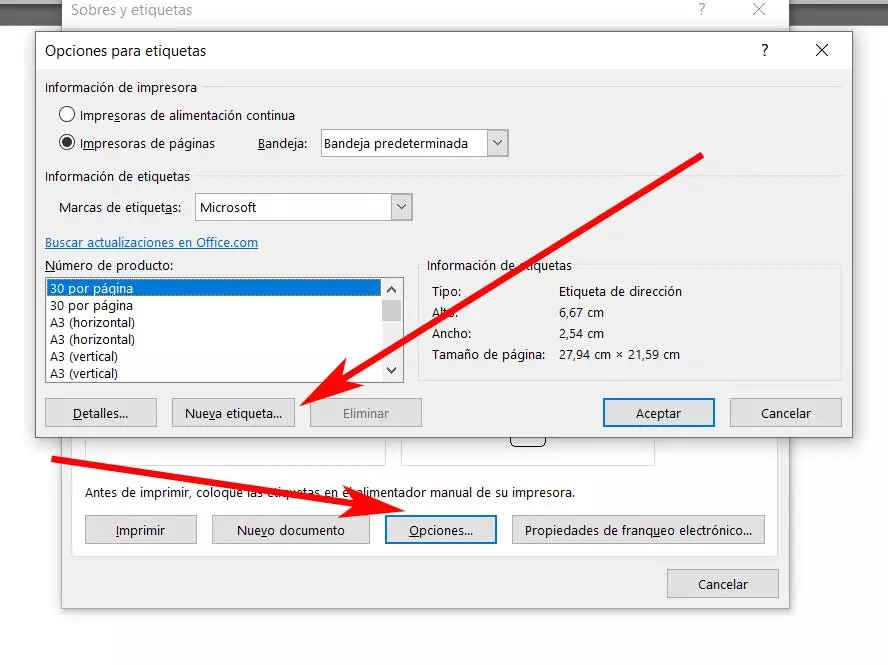
Next, in the new window that appears, click on the Leave Options button, which will allow us to create a new tag with a single mouse click. Now we will have the possibility of establishing the size of the different parts of it, as well as assigning it a representative name. After that and when clicking on new document, the Word work desk will be filled with the corresponding labels that we are going to use with its pre-established design.
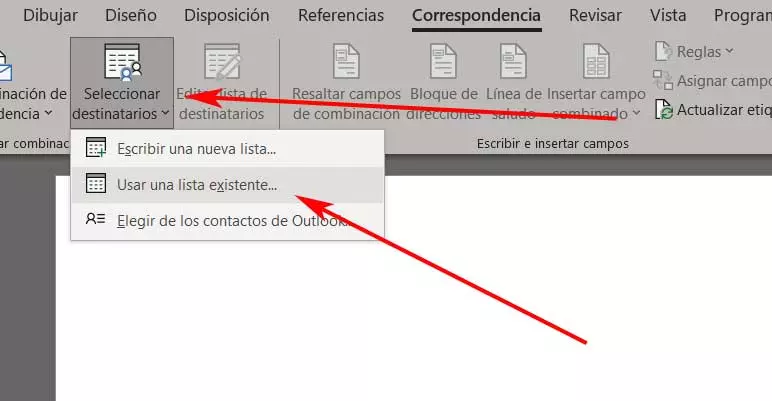
Obviously they are still blank, since we have not indicated to the program the data source to use to fill in these elements that we are designing. Thus, once we have all the on-screen labelswe go back to the Correspondence section, but in this case we are going to tell the program the data source to fill in the labels.
In this case we click on the drop-down list Select recipients. Now we just have to click on Use an existing list. Here we load into the program the Excel file that we created earlier with the label content.